


In previous tutorials, we covered various Astroport contracts that make up the core of the protocol. However, oftentimes, developers are building user-facing applications that require further integrations with existing contracts. For example, building a new UI for Astroport, integrating Astroport swaps in web wallets, building a DEX aggregator on top of Astroport, and so on. In the first tutorial of this new series, we will walk through a general strategy for implementing Astroport swaps directly into your web app. This will tie previous concepts from our smart contract series and push the code closer to production.
Strategy
When it comes to swapping tokens, there are several layers that are at work in the background, such as wallet functionality, fee calculations, and more. Although contracts remain decentralized and platform agnostic, oftentimes, web applications become centered around a particular wallet and its message types to broadcast and transact. This tutorial does not focus on any specific wallet or implementation and instead takes a more abstract approach allowing developers to have flexibility in their integration. For example, you might be creating your own wallet directly and just need to understand how the swap integration works. In future tutorials in this series, we will discuss wallets, estimating fees, and other topics in depth.
Before we swap tokens, we will also need to simulate our swap. This will return information that is required as inputs in our actual swap message (namely max spread and belief price).
The recommended strategy is to use a modular architecture like React components, with the simulation and swap functionality as a hook. Your index.ts file will handle user-facing logic. However, this strategy is flexible enough to be implemented using another framework.
Let’s begin.
useSwap
In this tutorial, we will be using a useSwap hook that stores both our simulation query and our swap executable message. First, our simulation query. At the most abstract layer, we need a function to call our client using smart contract queries. This function will take in a pool address and the query message itself. In this case, the simulation message consists of an offer asset (amount and contract address).
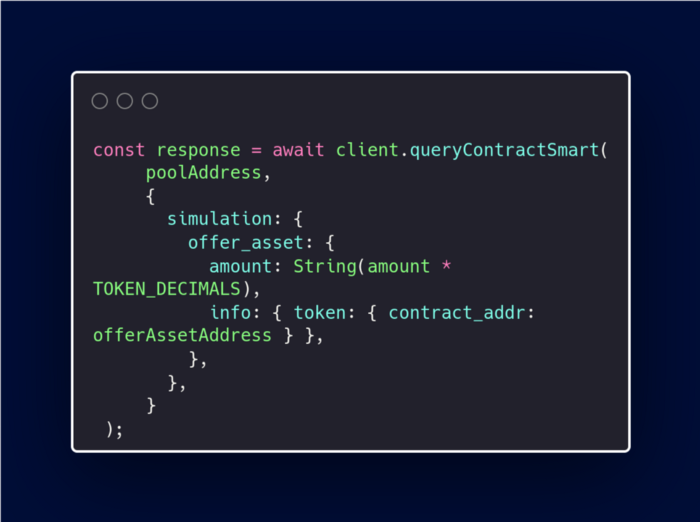
Note that the amount is multiplied by a constant ( TOKEN_DECIMALS) to normalize the value. In the case of ASTRO/xASTRO, the tokens have 6 decimal places.
const TOKEN_DECIMALS = 1000000;
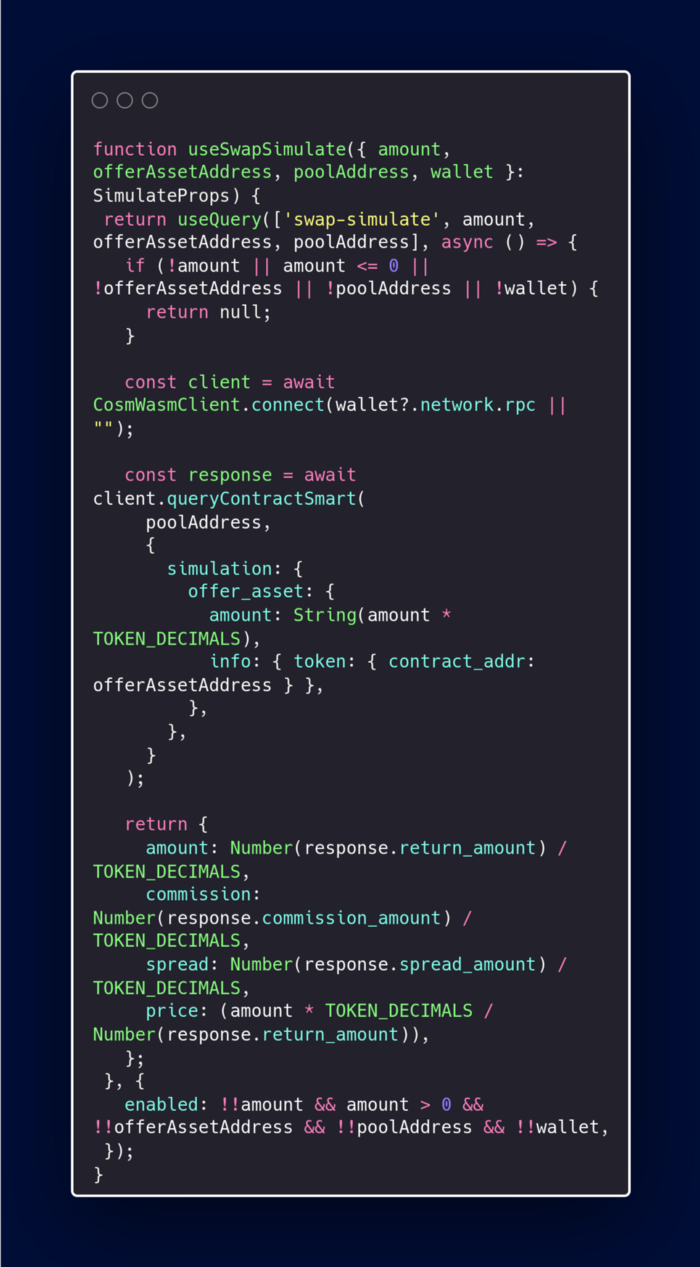
In a React hook, this logic could look something more like this:
Let’s break this down:
Our function takes in several SimulateProps which we have defined as:
.png)
Depending on your wallet, your implementation may look a bit different, but all calls to the simulation query will need more or less the same type of information. In our example, here is where we connect to our client:
.png)
Lastly, note that we are also specifying the type of information we would like returned. This will be useful in performing our actual swap:
.png)
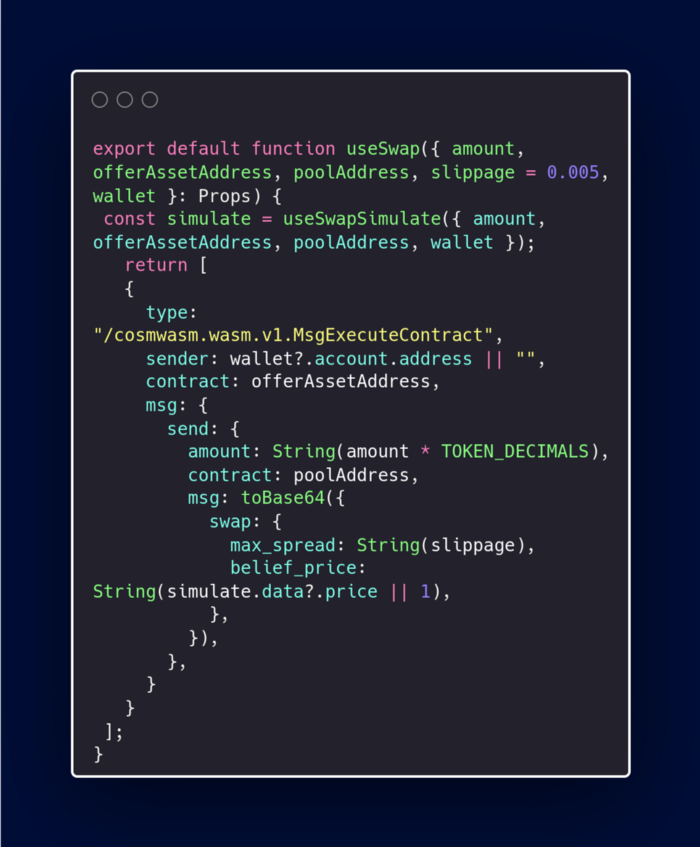
For the swap itself, the structure is quite similar. First the code:
Some notes:
- Unlike our simulation function, we are exporting our useSwap function to use later in our application.
- Our props are mostly the same. In this example, we set a default value for our slippage set to 0.005. This prevents our belief_price from deviating too much from the actual price when performing our swap.
- We call the simulate function within our useSwap function and use our props as inputs. Remember, this query returns useful information we can call later in our function.
- Every function, despite wallet differences, will have to specify the type of message, information about the sender, the contract that is being interacted with, and the message itself.
- The executable message contains an amount to swap, the Astroport pool address to swap tokens between, and a Base64 encoded message.
- We use the following function to encode our message:
.png)
- Lastly, our max_spread and belief_price are plugged into our function.
index.ts
Now that we are done with our useSwap component, we can move on to our index.ts file. In this section, we will work on calling our hook and integrating it with a front-end app.
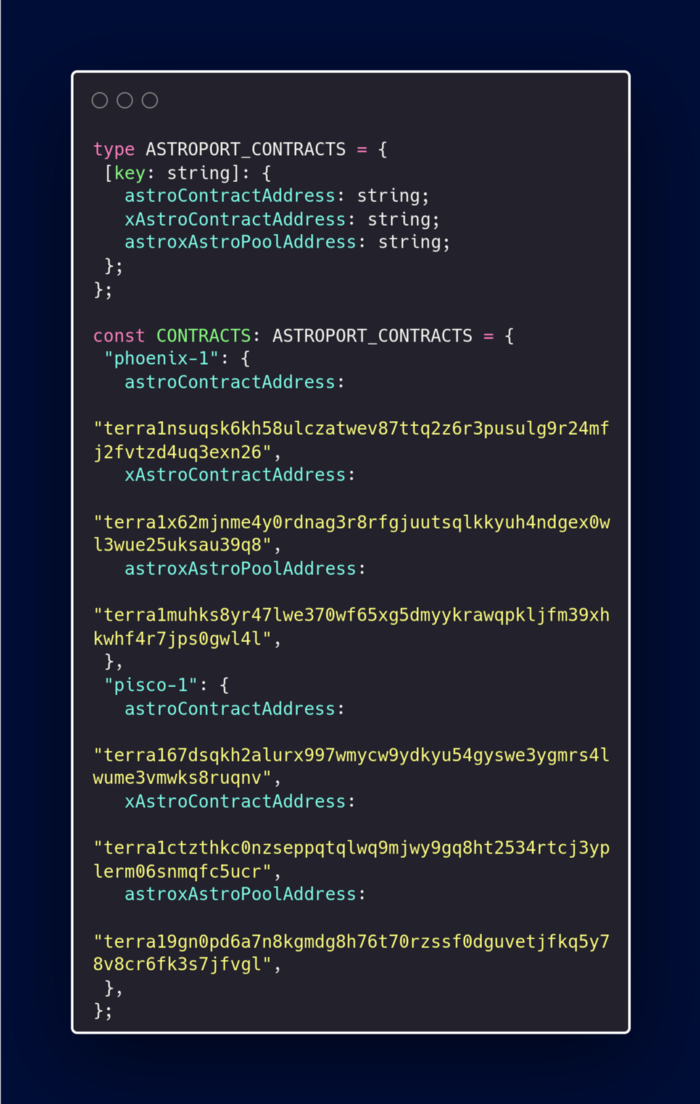
First, we will define the contracts that we will be working with. For our purposes, we will limit it to ASTRO-xASTRO swaps:
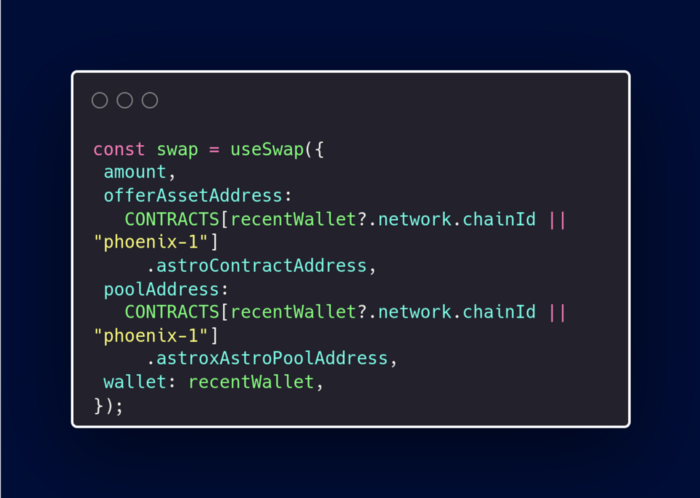
Next, we define a variable that calls our useSwap hook that we just created. We use our CONTRACTS constant as an input for our offerAssetAddress and poolAddress props:
Now we broadcast our transaction! Our transaction takes in our executable message (swap.msgs from above), the feeAmount, and gasLimit (the last two will be discussed in a future article):
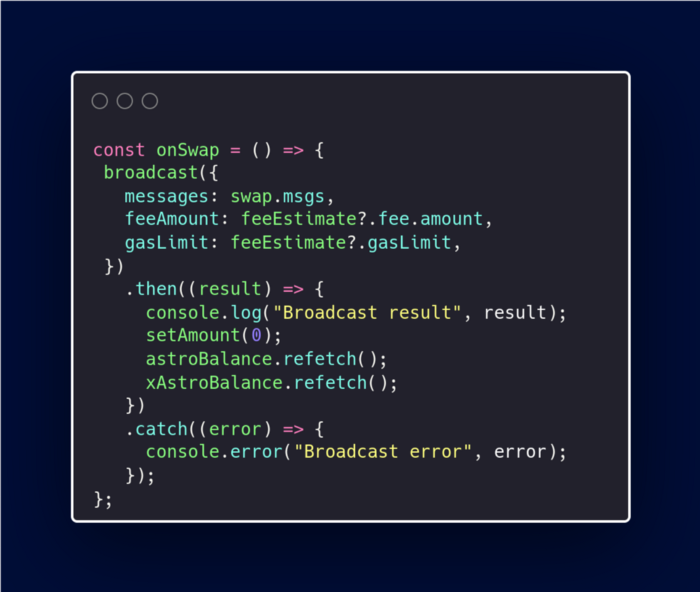
Note that our function also logs our results and refetches our balance after the transaction is complete.
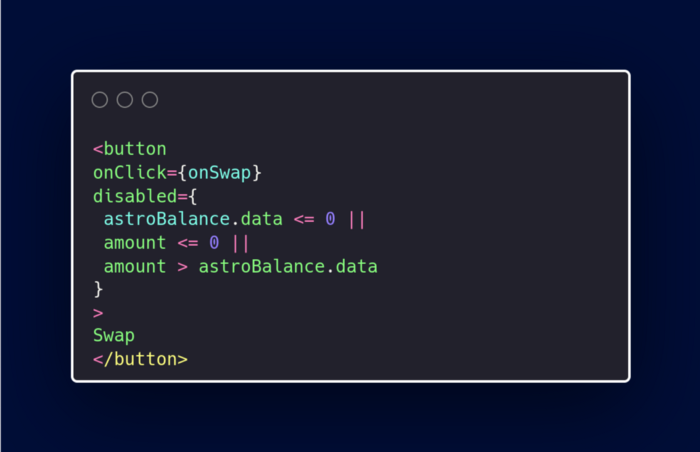
Lastly, to use this onSwap function in our actual UI, we use a Swap button to broadcast our transaction (note that you will have to implement further logic outside of the scope of this article to sign and confirm the transaction):
That’s it! We simulated and performed the swap functionality as isolated hooks. We called our hook in our index.ts application logic. And we plugged in our application logic directly into a button.
Stay tuned for future tutorials that build upon this series!
✦ Follow Astroport on Twitter and subscribe to the Astroport email newsletter to get the latest alerts from the mothership.
DISCLAIMER
Remember, Terra 2.0 and Astroport are experimental technologies. This article does not constitute investment advice and is subject to and limited by the Astroport disclaimers, which you should review before interacting with the protocol.